
Read time: 7 Min
Switching to Office 365 is not just about creating a new email account. It also means moving your years of data that are stored in a PST file. Without importing these files, your migration remains incomplete. Here in this post, we’ll explore how to migrate PST to Office 365 using Microsoft tools and our BLR PST Converter software. We will cover;
- Why is importing PST necessary?
- What to prepare before migration?
- Manual solutions to import PST file to Office 365.
- common challenges faced with the native Microsoft tool.
- and a much easier automated alternative.
Without any further delay, move ahead and talk about the process, but before that, let’s discuss a few important aspects.
Reasons to Import PST to Office 365 Account
Before starting the migration, it’s important to know the key reasons and benefits of migrating PST file data into a Microsoft 365 mailbox. PST file is mostly used to archive old Outlook emails, however sometimes it also causes some issues. Thus, moving them into a secure space will be helpful. Here are a few reasons to migrate PST file into Microsoft 365:
- Centralized Data Management: PST file scattered all over your system, and it will be difficult to manage them. Instead of leaving all this data on your machines, it is best to move it into the Office 365 inbox.
- Easy Access: Once you upload PST to Office 365, it is easy to view PST emails on any device. The system must connect with the internet, and you can manage your PST file data without any hassle.
- Reduced Risk of Data Loss: A PST file that is stored in your local device can be easily corrupted, damaged, or forgotten. Therefore, it will be beneficial to import PST file to Microsoft 365 account.
- Compliance and eDiscovery: For legal discovery and regulatory requirements, PST data must reside in Office 365 so teams can perform organization-wide searches and apply retention policies.
Because of these reasons, PST to Office 365 migration has become a common task. Note: Before you start the importing process, prepare these things;
- You must have the right to access the Microsoft Purview / Compliance portal.
- Check if your PST file is healthy and can easily open in Outlook.
- Ensure your Office 365 has ample storage space.
- You must know which PST belongs to which mailbox.
Now you are well prepared, let’s focus on the actual importing process.
Manually Import PST to Microsoft 365 Account
There are two methods offered by Microsoft to import PST file, and today we will discuss both solutions here. Here are the official methods:
- Network Upload (most common)
- Drive Shipping (physical delivery)
Let’s discuss both the manual solutions in detail with a complete step-by-step guide.
Method 1. Network Upload Using AzCopy
It is a method that lets you move PST files from your local system or network share to temporary Azure storage by Microsoft. After importing, the data can be migrated into user mailboxes in Microsoft 365 or Office 365. Before you use this method, you must have admin control. Here are the steps.
Step 1: Login Office 365 Admin Account
- Go to https://login.microsoftonline.com/ on your browser.
- Provide the Admin email id and click on the Next button.
- Now enter the password and click the Sign in button.
Step 2: Assign the Mailbox Import Export and Mail Recipients Role
After successfully login the admin account, you have to assign the mailbox import export role and Mail Recipients to the admin or those users who will perform the migration process. For this:
- Open the Microsoft 365 panel, click on Admin.
- There click on Show All and select Exchange to open Exchange Admin Center.
- Here, click on Role and select Admin Role.
- Now select organization management and click on Permission.
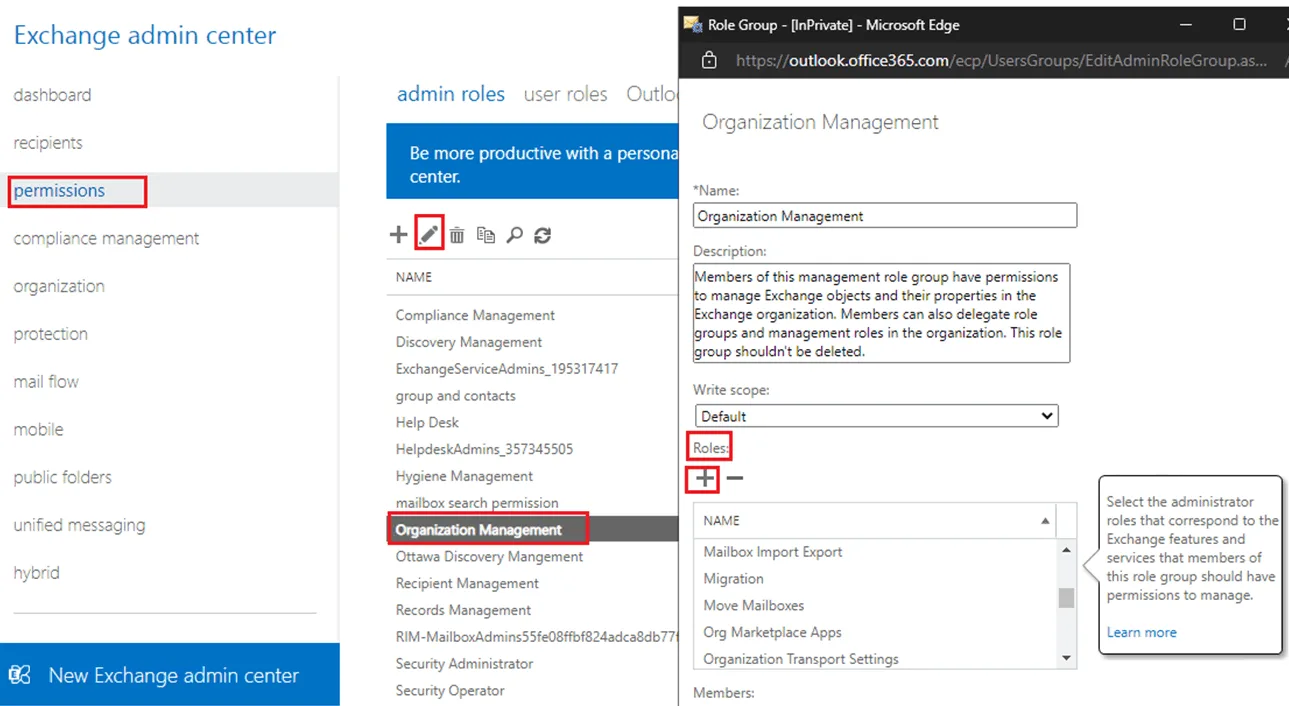
- Here, find & select Mailbox Import Export and Mail Recipients and click on Save.
- Now, click on Assign and select the Add option.
- Search and select Admin ID or select the users whom you want to provide the Mailbox Import Export and Mail Recipients role, and click on the Add button.
Step 3: Create Import Job to Import PST to Office 365
Before starting the migration process, you need to create the import job. Here are the steps for that.
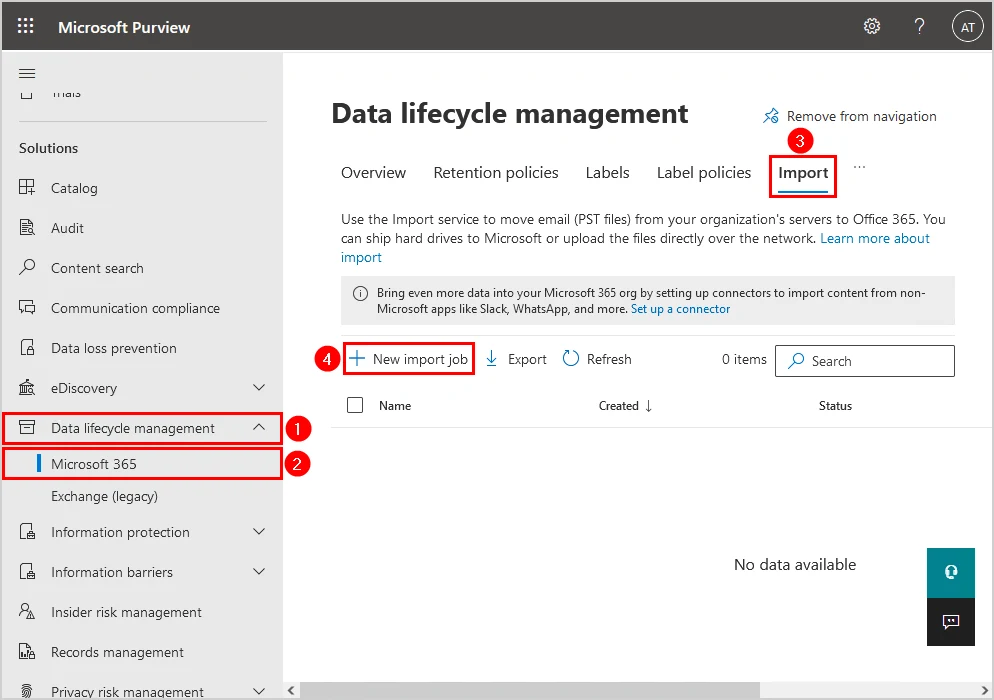
- Visit the Microsoft Exchange Admin Center, click on Show All.
- Now select Microsoft Preview to open the Microsoft Preview panel.
- Here, select Data Lifecycle Management → Import and click on New Import Job.
- Now, after that, provide a unique Import Job Name and press the Next button.
- Now select Upload your data and click the Next button.
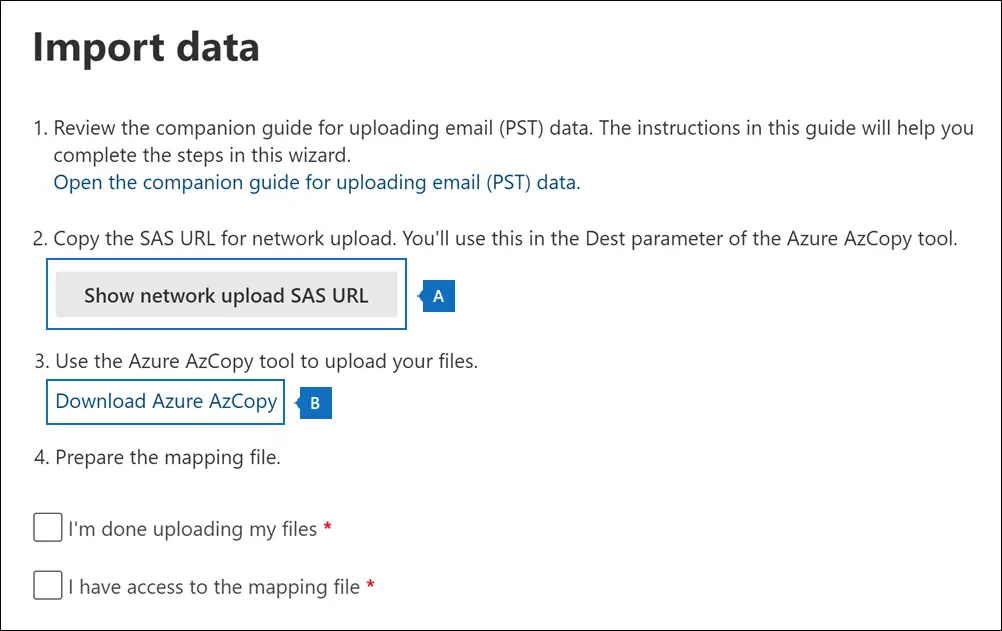
- After that, click on Show Network Upload SAS URL.
- Copy the SAS URL and click on Download Azure AzCopy.
- Select and download the AzCopy portable binary, which is suitable for your system.
- Now unzip the file and click on the downloaded unzip folder.
- Copy and save the path of this file location.
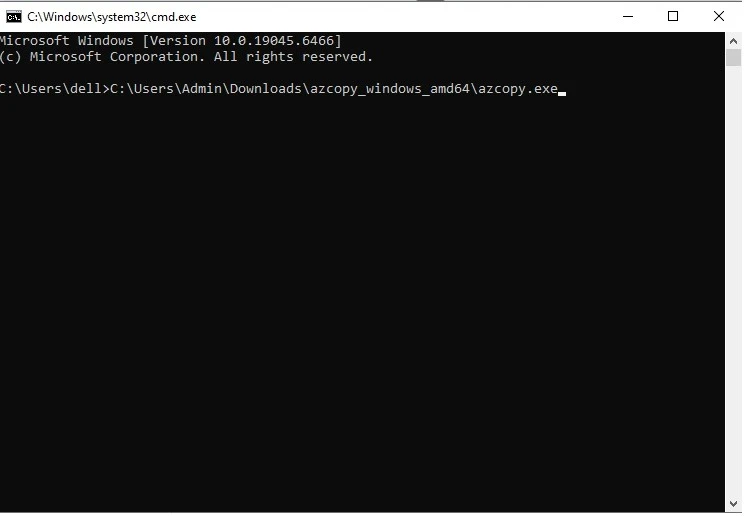
Run AzCopy Command
- Now open the command prompt and run the copied path as a screenshot.
C:\Users\Admin\Downloads\azcopy_windows_amd64\azcopy.exe
- Now, visit the location where your PST file is located.
- Right-click on that PST file that you want to export, click on Properties, and copy the PST file path.
- Now copy and update the command below. Put the copied Source Location of the PST file and the SAS URL. azcopy.exe copy “” “”
- Now copy and run the command on the command prompt.
- Here, wait till the file loads.
Continue the Import Job
- Now back to Exchange Preview.
- Enable check box: I’m done uploading files, and I have access to the mapping file.
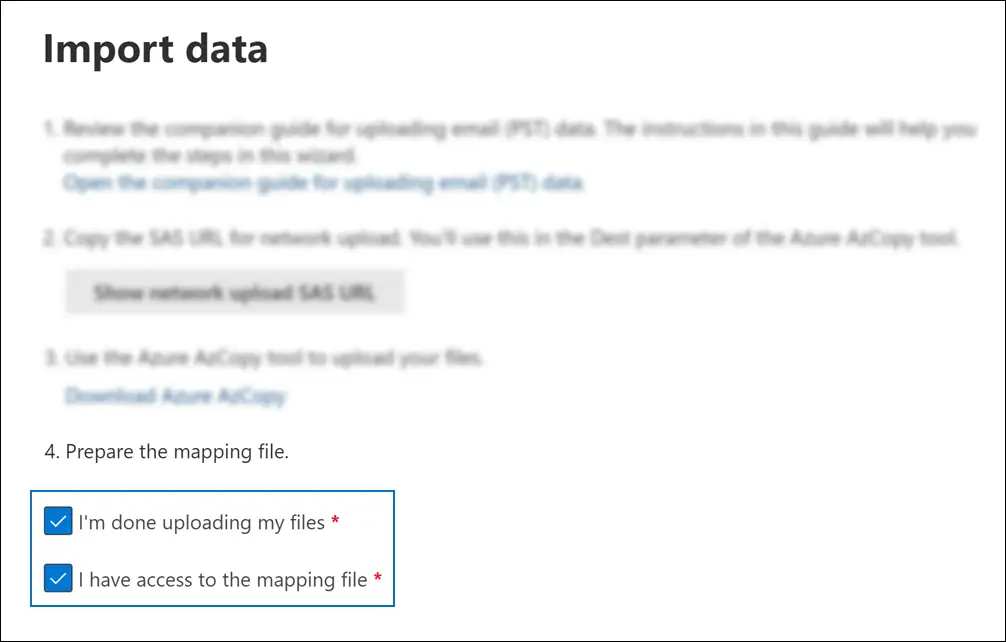
- Now click on the Next button.
Upload the CSV Mapping File
- Download the sample CSV template from Microsoft: https://go.microsoft.com/fwlink/p/?LinkId=544717
- Open the downloaded file and edit it according to your requirements (fill in the mailbox details, PST file path, and other necessary fields as shown in the example).
- Save the file after making the changes.
- Go back to the import wizard and click the Upload file.
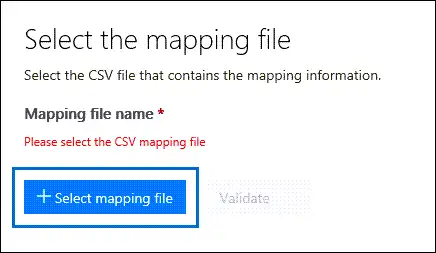
- Browse and select the updated CSV file.
- Run the validation to make sure there are no errors.
- Once validation is successful, click Next to continue.
Final Verification & Submission
- Now verify all details and press the Submit button.
- Now the file will be uploaded to the cloud.
- After uploading, click on Done.
Monitor Import Job
- The Import Job has been created.
- Here, wait till the import job process is complete.
- Clicking on the Refresh button, you can check the current progress status.
Start Import to Office 365 Mailbox
After the import process is completed:
- Select the created job.
- Click on Import to Office 365.
- If you want to apply any filter, select I want to filter it before importing.
- Or select No, I want to import everything and press the Next button.
- Now you can see the data size.
- Here, directly click on Submit.
- Now the upload to the cloud is successfully done.
- Press the Done button.
Track Final Status
- Click on the Refresh button.
- Now the Import process has started.
- Here, wait till the process is over.
- By clicking Refresh, you can check the current progress status.
Here, you import PST emails to Office 365 mailbox. Let’s check out another method.
Method 2. Drive Shipping Method for PST to Office 365 Migration
If you find the Network upload method complex or not feasible, Microsoft allows physical disk shipping. You can use this solution when you have extremely large datasets. Here, all you need to do is:
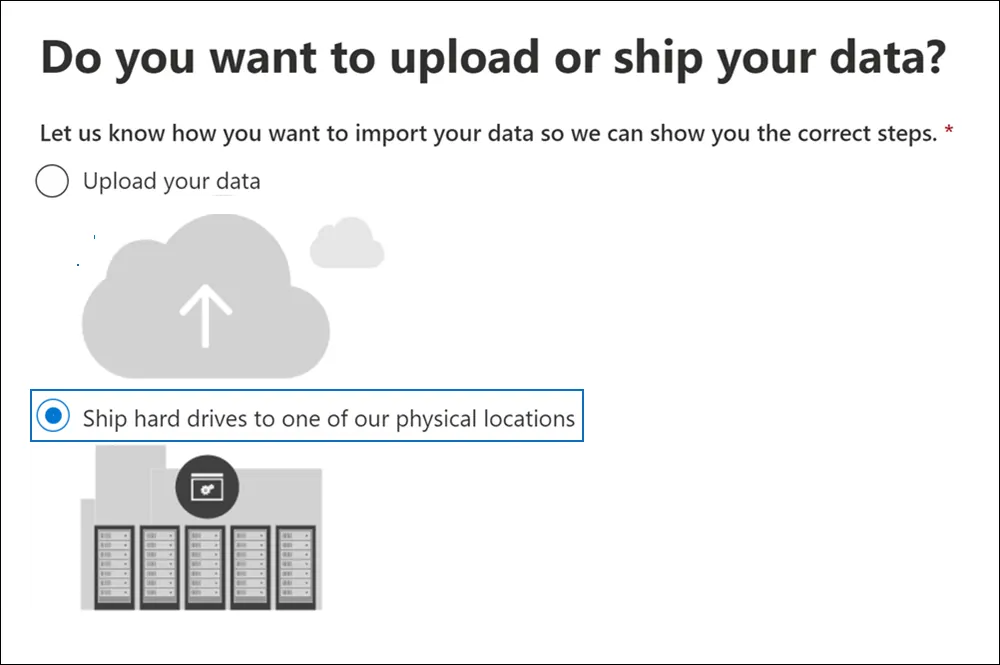
- Copy PST files to encrypted drives
- Ship them to Microsoft
- Microsoft uploads them to Azure after checking them.
- After that, you need to complete the mapping process that is mentioned above.
Here are both the solutions to migrate PST file to Microsoft 365 mailbox.
Limitation With Manual Method
- There are too many steps to follow that take a long time to complete.
- You must have all the knowledge about using Microsoft 365 and the Exchange Admin Center.
- While mapping the CSV file if there is a single mistake, then the whole import process will fail.
- Wrong permissions or incorrect commands can stop the job.
- If the process fails, you may need to restart from the beginning.
- Managing many mailboxes at once is difficult.
Directly Import PST to Office 365 Mailbox
If you want an instant and error-free solution for migration, then you must try out PST Converter. The tool will migrate PST emails, contacts, calendars, and other data into Office 365 mailbox in a few simple clicks. All you need to do is add the PST file and choose Office 365 as an export option. After authenticating with your Office 365 login details, click the export button to start the migration.
Additionally, you can also import a selective PST folder. The tool also offers a date range filter to migrate emails from a specific date. If the data fileis damage, then this tool repair PST file for you and then you can easily open PST file in Office 365 mailbox.
Download the demo version and experience the PST to Office 365 migration.

Manual Method vs Professional Method: Quick Comparison
| Feature | Manual Method | Professional Tool |
|---|---|---|
| Ease of Use | Complicated, many steps | Easy PST to Office 365 migration |
| Preview Option | Not available | Available |
| Filtering | Limited | Folder Selection Option |
| Support Corrupted PST File | No | Yes |
| Split Large PST file | No | Yes |
Conclusion
Before picking a method, go through all the options described above and choose the one that suits your needs. Many IT experts prefer professional tools to import to Office 365 because they keep the data safe and reduce the chance of any loss. Free or manual methods can also be used, but they are usually time-consuming and may require technical knowledge. So, select the solution based on how much data you have and how comfortable you are with the process.